
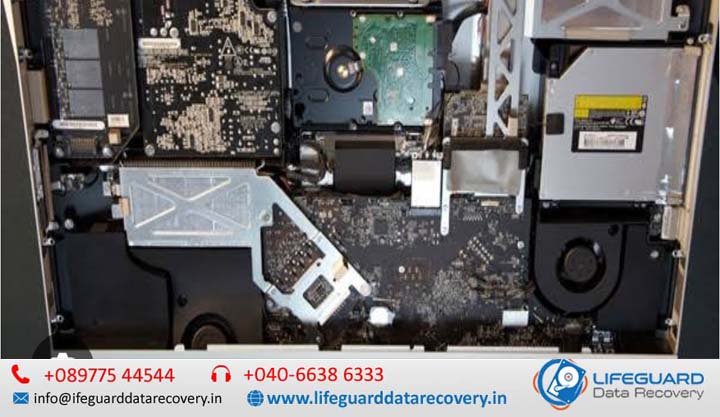
A sudden Mac hard drive failure can bring your workflow to a halt, leaving you facing system crashes, unbootable screens, or inaccessible personal files. Whether your Mac uses an older mechanical Hard Disk Drive (HDD), a Fusion Drive, or a modern soldered Solid-State Drive (SSD), storage issues require immediate, methodical action to prevent permanent data loss.
This guide covers how to identify early warning signs of hard drive failure on Mac, run safe diagnostic tests, resolve common Mac hard drive problems, and choose the right Mac hard drive recovery path before your data becomes unrecoverable.
Understanding Mac Storage Drive Failure: HDDs vs. Modern SSDs
How a Mac storage drive failure unfolds depends heavily on your hardware architecture. Legacy Intel Macs often utilize mechanical HDDs or hybrid Fusion Drives, whereas modern Macs (including Apple Silicon M1, M2, M3, and M4 models) rely entirely on high-performance, board-soldered NVMe SSDs managed by internal Apple controllers or the Secure Enclave.
| Feature / Dynamic | Mechanical HDDs & Fusion Drives | Modern Apple Silicon & T2 SSDs |
| Primary Failure Mechanism | Physical wear, motor failure, read/write head crashes | NAND flash degradation, controller crashes, firmware failure |
| Warning Signs | Clicking, grinding noises, severe file corruption | Sudden lockups, read-only mode, Kernel Panics |
| Repair / Swap Feasibility | Modular; replaceable in older MacBooks & iMacs | Soldered directly to the logic board; non-upgradeable |
| Recovery Risk Level | Mechanical failure requires cleanroom intervention | Encryption ties data to the logic board CPU/Secure Enclave |
Understanding these differences helps determine whether you are dealing with a software/logical file system error or a critical hardware breakdown.
Top Mac Hard Drive Failure Symptoms to Watch For
Recognizing how to tell if Mac hard drive is failing early gives you the best chance to back up critical files before the drive stops responding entirely. Mac hard drive failure symptoms generally fall into three distinct categories.
Audio and Visual Warning Signs (Clicking, Question Mark Folder)
Physical and visual cues are often the most immediate indicators of drive distress:
-
Clicking or Grinding Sounds: A Mac hard drive making clicking noise indicates that the mechanical read/write heads are hitting physical alignment stops or scraping against magnetic platters. Stop using the drive immediately to avoid platter scoring.
-
Flashing Folder with Question Mark: Seeing a Mac folder with question mark hard drive error on boot means the system firmware (EFI) cannot locate a valid macOS system folder or bootable startup disk.
-
Prohibited Symbol or Gray Screen: Indicates that macOS detected a corrupted system file structure on the startup volume during the boot sequence.
System Sluggishness and Unmounting Drives
Logical errors or developing bad sectors often manifest as performance degradation:
-
Extreme OS Latency: A Mac hard drive running slowly—characterized by constant spinning beach balls, delayed file previews, or frozen Finder windows—frequently points to bad blocks or dying NAND flash cells.
-
Spontaneous Drive Unmounting: If an external or secondary drive randomly disappears, it points to a Mac disk not mounting correctly due to file system corruption or power dropouts.
-
Files Mysteriously Disappearing: Files failing to open, showing 0-byte file sizes, or returning read errors indicate file system corruption.
Boot Failures and S.M.A.R.T. Errors
When critical system structures are damaged, boot processes fail completely:
-
Kernel Panics on Startup: A Mac not booting due to hard drive failure often reboots repeatedly while displaying multi-lingual crash error messages.
-
S.M.A.R.T. Status Warnings: Disk Utility or third-party monitoring tools reporting a Mac hard drive SMART failure mean the drive’s internal self-monitoring system has detected hardware attributes exceeding critical error thresholds.
What Causes Mac Hard Disk Failure?
Identifying what causes Mac hard drive failure helps determine whether the root cause can be fixed via software commands or requires hardware servicing.
Physical Wear, Head Crashes, and NAND Flash Exhaustion
-
Mechanical Impact and Degradation: Dropping a laptop while the hard drive platters are spinning causes read/write heads to crash onto the media surfaces, leading to instant Mac internal hard drive failure.
-
NAND Write Wearout: SSDs write data in blocks. Over time, repeated write/erase cycles degrade the oxide layer in flash cells, resulting in bad blocks and eventual controller lockup.
-
Thermal Stress: Insufficient cooling or blocked exhaust vents on MacBooks accelerate silicon failure and cause solder joint fatigue on storage controller components.
File System Corruption and Improper Ejection
-
Unsafe Disconnections: Unplugging external drives without proper ejection causes incomplete write operations, corrupting APFS or HFS+ catalog trees.
-
Interrupted macOS Updates: Sudden power loss or crashes during system updates can leave the primary APFS container in an inconsistent, non-bootable state, leading to Mac disk errors and failures.
-
Bad Sector Accumulation: When the drive controller runs out of spare sectors to remap corrupt storage areas, logical file operations stall and crash the system.
Step-by-Step Mac Hard Drive Troubleshooting and Fixes
If your Mac is operational or capable of entering Recovery Mode, follow these systematic Mac hard drive troubleshooting steps to diagnose and repair software-level issues.
Step 1: Verify Hardware Connections and Desktop Settings
Before assuming a complete Mac hard disk failure, rule out basic connectivity and configuration errors:
-
Open Finder > Preferences (Settings) > General tab.
-
Ensure Hard disks and External disks are checked under “Show these items on the desktop.”
-
Inspect external cables and test alternative ports (Thunderbolt/USB-C).
-
If an external Mac internal disk not showing in Finder, open System Information (Option-click Apple Menu > System Information) > Storage/USB to check if the controller hardware registers at the bus level.
Step 2: Use Disk Utility to Repair System Errors
Disk Utility includes “First Aid,” a tool designed to fix logical APFS/HFS+ file system errors.
-
Open Disk Utility (found in
/Applications/Utilities/). -
Select View > Show All Devices in the top toolbar.
-
Select the physical drive (the top-level item in the sidebar), not just the underlying volume name.
-
Click First Aid, then click Run.
If Mac disk utility cannot repair disk or outputs errors like “File system check exit code is 8,” the file system structure is severely damaged. Back up accessible files immediately before attempting a reformat.
Step 3: Force-Mount and Diagnose via Terminal
When Finder fails to mount a volume, macOS command-line utilities can bypass GUI restrictions to inspect or force-mount volumes.
-
Launch Terminal from Applications > Utilities.
-
List all connected storage devices to identify your target volume path:
Bash
-
Locate your target disk identifier (e.g.,
/dev/disk2s2). -
Attempt a force-mount operation in read-only mode:
Bash
-
If the volume mounts, transfer essential data immediately using
rsyncor Finder.
Step 4: Boot into macOS Recovery (Intel vs. Apple Silicon)
If you are dealing with a MacBook hard drive failure that prevents normal booting, use macOS Recovery to access diagnostic tools.
-
On Apple Silicon Macs (M1/M2/M3/M4):
-
Shut down the Mac completely.
-
Press and hold the Power Button (Touch ID) until “Loading startup options” appears.
-
Select Options, then click Continue to access Disk Utility or Reinstall macOS.
-
-
On Intel-Based Macs:
-
Shut down the Mac.
-
Press the Power Button, then immediately hold Command (⌘) + R until the Apple logo or spinning globe appears.
-
Safe Mac Hard Drive Recovery Options
When diagnostic steps fail to resolve Mac hard drive not detected or Mac hard drive not working errors, shift your focus from repair to data recovery.
DIY Data Recovery Software: When It Is (and Isn’t) Safe
Data recovery software scans drives for lost partition structures and file headers.
-
Safe to Use When: The drive is physically healthy, S.M.A.R.T. status reports OK, and the failure is purely logical (such as accidental deletion or formatted volumes).
-
Unsafe to Use When: The drive displays bad blocks, mechanical clicking, or persistent disconnects. Stressing a degrading drive with prolonged scanning software can cause head crashes or NAND wear, turning recoverable files into permanent data loss.
Apple Silicon Share Disk Mode & Time Machine Backups
Modern Macs offer built-in recovery pathways:
-
Share Disk Mode (Apple Silicon): Connect your non-booting Mac to a secondary Mac using a Thunderbolt cable. Boot the failing Mac into Recovery Mode, select Utilities > Share Disk, and choose your startup volume. The target drive will mount as an external volume on the healthy Mac.
-
Time Machine Restores: If formatting is required to resolve a corrupted drive, boot into Recovery Mode, select Restore from Time Machine, and revert the system state to your most recent backup snapshot.
Professional Cleanroom Recovery: Handling Mechanical Failure
If your Mac exhibits severe hardware breakdown, mechanical head failures, or soldered SSD controller failure, software-based recovery will not work. In these cases, [professional Mac hard drive recovery services] evaluate the hardware in ISO-certified Class 100 cleanrooms, physically replacing failed heads or reading raw NAND flash chips directly via specialized hardware programmers.
How to Prevent Future Mac Storage Drive Failures
While hardware eventually degrades over time, proactive maintenance reduces the risk of catastrophic data loss:
-
Implement a 3-2-1 Backup Strategy: Keep 3 total copies of your data across 2 different media types (e.g., local Time Machine drive and external SSD), with 1 copy stored securely off-site or in the cloud.
-
Monitor Drive Health Proactively: Install background monitoring tools that utilize S.M.A.R.T. telemetry to alert you to rising bad sector counts before the drive fails completely.
-
Maintain Free Space Targets: Keep at least 15–20% of your primary SSD volume unallocated. This allows modern APFS file systems and SSD wear-leveling algorithms to manage garbage collection effectively without causing system stalls.
-
Practice Safe Unmounting: Always eject external drives in Finder before physically unplugging Thunderbolt or USB cables.
Frequently Asked Questions (FAQs)
Can a failing Mac hard drive be repaired without formatting?
Logical file system errors can often be repaired without formatting using Disk Utility First Aid or Terminal commands. However, physical hardware failures (such as damaged platters or degraded NAND flash) cannot be fixed via software. In those scenarios, copy your data immediately and replace the drive.
How much does professional Mac hard drive data recovery cost?
Standard logical recovery via software ranges between $100 and $300. Physical cleanroom data recovery for mechanical failure or damaged Apple Silicon logic boards typically ranges from $500 to $1,800+ depending on the complexity, required replacement components, and drive encryption state.
Can you replace the hard drive in newer MacBooks?
No. In almost all MacBook models released after 2016 (and all M-Series Apple Silicon MacBooks), the NVMe SSD chips and controllers are soldered directly to the main logic board. Upgrades or manual drive swaps require replacing the entire logic board assembly.