
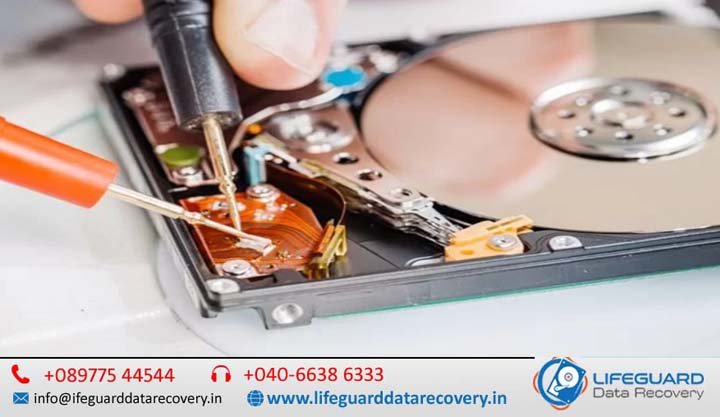
A failing mechanical hard drive is a ticking clock. Every rotation of its magnetic platters and every movement of its read/write heads can bring a degrading drive closer to total failure. If your drive is exhibiting erratic behavior, timing is critical.
If you need to know how to recover data from a failing hard drive, this guide covers safe DIY triage methods, sector-by-sector cloning techniques, and clear guidelines on when to stop DIY efforts and consult a professional.
Emergency Action Plan: What to Do the Second Your Hard Drive Starts Failing
If you suspect your drive is failing, immediate action is required to recover data before the hard drive fails completely.
-
Power Down Immediately: If the drive is making unusual noises, freezing your system, or causing blue-screen errors, disconnect power. Do not let the drive idle; background OS tasks (such as indexers or anti-malware utilities) continuously stress unstable media.
-
Do Not Run Native Disk Repairs: Avoid utilities like Windows CHKDSK or macOS First Aid on physical drives showing signs of degradation. These utilities attempt to repair the file system by writing, moving, and remapping data across bad sectors, which can stress failing drive heads to failure and overwrite target data.
-
Disconnect and Label: If dealing with external hard drive recovery, safely unmount and unplug the USB cable. For internal hard drive recovery, disconnect both the SATA data and power cables from the motherboard.
-
Prepare a Destination Storage Media: DIY recovery requires a separate, healthy target drive with equal or greater storage capacity than the failing media. Never attempt to save recovered files back onto the degrading drive.
Understanding Hard Drive Failure: Is Your Drive Logically Corrupted or Physically Damaged?
Determining the failure type is essential for selecting appropriate hard drive recovery methods. Hard drive failure generally falls into three categories:
-
Logical Failure: The drive’s physical components function properly, but the file system structure, partition table, or master file table (MFT) is corrupted. You may encounter prompts asking to format the disk before use. DIY recovery is often viable in these cases.
-
Physical Damage: Electrical damage to the Printed Circuit Board (PCB), cracked SATA ports, or water/heat exposure. DIY software cannot resolve physical component damage.
-
Mechanical Crash: Physical components inside the sealed drive enclosure-such as the actuator arm, spindle motor, or read/write heads-have failed or are actively scraping the platter surface. Software cannot fix mechanical failure; continuing to power the drive will destroy data platters.
Common Symptoms and Signs a Failing Hard Drive
Identifying early signs of a failing hard drive allows you to extract files before the storage controller locks up or the platters suffer irreversible damage.
Physical and Auditory Warnings (Clicking, Grinding, or Buzzing Noises)
Auditory abnormalities indicate mechanical problems:
-
Repeated Clicking (“Click of Death”): The read/write head assembly is attempting to calibrate or read system files, failing, hitting the physical limiter, and resetting. Attempting software-based clicking hard drive recovery at home will scrape magnetic material off the platters, making files permanently unrecoverable.
-
High-Pitched Grinding or Scraping: Indicates that the read/write heads have physically contacted the spinning platters (a head crash). Power down the drive immediately.
-
Buzzing or Beeping: Typically indicates a seized spindle motor or heads stuck directly on the platter surface (head sticktion), preventing the spindle from spinning up.
Performance and File System Symptoms (Sluggishness, Corrupted Files, & Freeze-Ups)
Software-level indicators often precede physical hardware collapse:
-
Slow Hard Drive Data Recovery & Transfer Speeds: Transfer rates dropping to zero bytes per second or Windows Explorer freezing when attempting to copy files indicates the drive controller is hung on bad sectors.
-
Spontaneous Corruption: Files failing to open, reporting invalid file formats, or displaying altered file names points to expanding file system corruption or degraded sectors.
-
Operating System Freezes: The host computer hangs whenever the failing storage device is connected, caused by the OS waiting for an I/O response from non-responsive sectors.
System & Hardware Recognition Issues (SMART Errors & Drives Not Detected)
Hardware monitoring services and BIOS environments provide early warning logs:
-
SMART Hard Drive Errors: Self-Monitoring, Analysis, and Reporting Technology (S.M.A.R.T.) warnings during POST boot up-such as “Reallocated Sectors Count,” “Current Pending Sector Count,” or “Uncorrectable Sector Count”-indicate hard drive degradation.
-
Drive Shows as RAW or Uninitialized: Operating systems cannot identify the file format (NTFS, FAT32, APFS) due to master boot record or partition table corruption, necessitating steps to recover data from corrupted hard drive volumes.
-
Device Not Detected: The BIOS/UEFI or OS Disk Management console does not detect the storage device, signifying hardware-level failure, corrupted firmware, or interface failure requiring hard drive not detected recovery evaluation.
DIY vs. Professional Hard Drive Data Recovery: Decision Matrix
Use this matrix to assess whether your drive is suitable for DIY recovery methods or requires cleanroom evaluation:
| Failure Scenario / Symptom | Primary Cause | Safe for DIY Software? | Recommended Action |
| Clicking, grinding, or buzzing | Mechanical head crash / motor failure | NO | Power down immediately; send to a professional hard drive data recovery service. |
| SMART attribute failure warnings | Sector degradation | Conditional | Clone drive sector-by-sector via image tool; do not scan original media directly. |
| Accidental format or file deletion | Logical metadata removal | YES | Run recovery software targeting original volume from a secondary healthy OS host. |
| Raw file system / inaccessible drive | Partition table structure corruption | YES | Mount as secondary drive; create sector image, then run failing HDD recovery software. |
| Drive completely dead (no spin, no light) | PCB failure / electrical surge | NO | Seek hardware component replacement or professional PCB adaptation. |
| Dropped drive while operating | Mechanical misalignment / surface damage | NO | Do not power on; cleanroom physical recovery is required. |
Step-by-Step Guide: How to Recover Data from a Failing Hard Drive Safely
If your drive does not show mechanical clicking or grinding, follow this step-by-step methodology to recover files from a failing HDD while minimizing media stress.
Step 1: Isolate the Connection (Internal vs. External Hard Drive Recovery)
Faulty USB cables, damaged bridge boards inside external enclosures, or poor SATA connections can mirror hard drive failure symptoms.
-
For External Drives: Carefully disassemble the external plastic enclosure to access the standard SATA drive inside (Note: Some modern 2.5-inch external drives have native USB controllers soldered to the PCB). Connect the drive directly to a desktop computer’s internal SATA motherboard port and SATA power cable to bypass faulty enclosure electronics.
-
For Internal Drives: Replace standard SATA cables and test alternative motherboard ports. Ensure the computer power supply unit (PSU) delivers adequate power.
Step 2: Check S.M.A.R.T. Health Without Stressing the Drive
Use lightweight, non-intrusive tools to inspect drive health indicators without initiating heavy disk reads.
-
Download a portable diagnostic utility (such as CrystalDiskInfo for Windows or smartctl via Smartmontools for Linux/macOS).
-
Review critical S.M.A.R.T. parameters:
-
05Reallocated Sectors Count: Indicates sectors that failed and were remapped to spare sectors. -
C5Current Pending Sector Count: Unstable sectors waiting to be remapped due to read errors. -
C6Offline Uncorrectable Sector Count: Sectors that failed read/write attempts permanently.
-
-
If pending or reallocated sector counts are high or continuously increasing, stop direct file copying. Proceed directly to disk imaging.
Step 3: Create a Sector-by-Sector Clone (Disk Image First Method)
Never run data recovery software directly on a degraded, failing hard drive. Recovery software subjects the drive to intense, random read patterns that can cause weak heads to fail completely during the scan.
Instead, create a sector-by-sector clone to recover files from damaged hard drive media using non-destructive utilities designed for unstable media, such as GNU ddrescue or HDDSuperClone (available via live Linux environments like System Rescue).
Using DDRescue to Image a Failing Drive:
-
Boot into a Linux Live Environment with target storage attached.
-
Identify your source failing drive (e.g.,
/dev/sdb) and healthy destination target drive/image location (e.g.,/dev/sdcor an image path/mnt/target/drive_image.img). -
Run an initial fast pass to copy undamaged sectors first, skipping problematic blocks:
Bash
-
Run a second pass to attempt reading scraping/damaged sectors logged during pass one:
Step 4: Run File Recovery Software on the Cloned Image
Once the sector-by-sector disk image (drive_image.img) is safely stored on a healthy physical drive, disconnect the failing drive permanently. You can now perform hard disk data recovery on the image file safely.
-
Launch your preferred data recovery software (such as R-Studio, DMDE, TestDisk, or UdfExplorer).
-
Select the option to load or mount an existing disk image file rather than scanning physical hardware.
-
Perform a deep file system scan on the raw image file.
-
Preview detected files, file directory trees, and photos to verify file integrity.
-
Extract files to a third, completely healthy destination drive.
Step 5: Fix Inaccessible Partitions and File System Corruption
If the sector clone preserved partition structures, but the host system marks the volume as unreadable:
-
Mount the created disk image in read-only mode using partition management tools or command-line image utilities.
-
To recover data from inaccessible hard drive or RAW volumes, use tools like TestDisk targeting the image file to restore missing Master Boot Record (MBR) structures, GUID Partition Tables (GPT), or boot sectors without altering physical source disks.
When to Stop DIY and Use a Professional Hard Drive Data Recovery Service
DIY recovery has physical limits. Continuing software extraction attempts under the following circumstances risks permanent, irrecoverable data loss:
A professional hard drive data recovery service handles critical mechanical and electrical failures using specialized infrastructure:
-
ISO-Certified Cleanrooms: Class 100 (ISO 5) cleanroom environments prevent microscopic airborne dust particles from settling on open drive platters during internal servicing.
-
Head Stack Replacement: Engineers use head swap alignment tools and identical donor drives to replace damaged read/write head assemblies.
-
Firmware Repair: Specialized hardware utilities (such as PC-3000) allow technicians to access and repair drive service areas, module tables, and translator maps directly.
Dangerous DIY Myths That Will Permanently Destroy Your Data
Internet forums often share outdated or hazardous workarounds for failing drives. Avoid these common myths:
-
The “Freezer Trick”: Storing a failing hard drive in a sealed bag inside a freezer was occasionally attempted on 1990s drives to temporarily free stuck mechanical components. On modern high-density hard drives, freezing introduces moisture condensation onto magnetic platters, rusting internal components and destroying read/write heads upon power-up.
-
Opening the Hard Drive Casing: Never open a hard drive cover outside a certified cleanroom. A single dust particle resting on a platter surface creates a microscopic obstacle. When the read/write head flies over the platter at high speeds, hitting that particle causes instant head crash damage.
-
Slapping or Tapping the Drive Shell: Striking a drive to free stuck heads damages platter coatings and misaligns delicate actuator arm bearings.
-
Running Automated OS Disk Repair Tools (CHKDSK / Disk Utility): Running repair routines on unstable media causes heavy read/write operations over unstable sectors, accelerating drive degradation and overwriting file references.
How to Prevent Future Data Loss Before Your Hard Drive Fails
Protecting your data against hardware failure requires proactive backup procedures:
-
Implement the 3-2-1 Backup Strategy:
-
Keep 3 total copies of critical data.
-
Store backups on 2 different media types (e.g., internal storage + local external hard drive/NAS).
-
Keep 1 copy completely offsite or in a secure cloud service.
-
-
Automate S.M.A.R.T. Health Monitoring: Install disk health background utilities (such as Hard Disk Sentinel or smartd) to receive automated email notifications at the first sign of sector reallocations or temperature spikes.
-
Replace Aging Storage Devices: Mechanical hard drives have an average operational lifespan of 3 to 5 years. Replace primary storage media proactively once drives reach historical failure thresholds.
Frequently Asked Questions (FAQs)
Can I recover files from a clicking hard drive at home?
No. Clicking indicates mechanical failure, usually caused by a damaged read/write head assembly, degraded actuator arm, or firmware access failure. Software tools cannot repair physical components, and powering a clicking drive risks permanent platter damage.
Is it safe to run CHKDSK or First Aid on a failing hard drive?
No. Tools like Windows CHKDSK or macOS Disk Utility First Aid are designed to fix logical file system errors on physically healthy storage media. On a failing drive, these routines execute aggressive read/write operations that stress degrading drive components and can overwrite recoverable data.
How do I recover data if my hard drive is not detected by my computer?
First, isolate interface issues: test alternative cables, ports, and direct SATA connection points. Check if the drive is recognized in BIOS/UEFI or OS Disk Management. If the drive does not spin up or fails to register in BIOS, software recovery is not possible; physical service by a recovery specialist is required.
Conclusion: Protecting Your Data When Drives Begin to Fail
When dealing with a failing hard drive, follow a simple rule: minimize drive stress.
If the drive is non-mechanical and still readable, create a sector-by-sector clone image first, then extract files safely using software on the secondary image file. If the drive clicks, grinds, or drops out of BIOS detection entirely, power down immediately and consult a professional cleanroom data recovery lab to save your critical files.