
Cloud storage disaster recovery guide
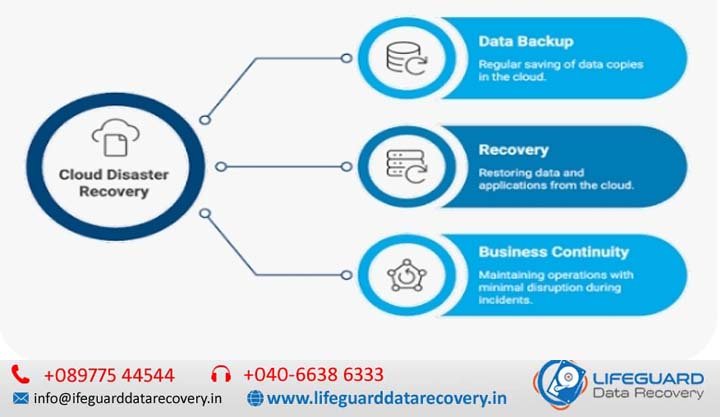
Cloud storage disaster recovery is an enterprise system’s ability to preserve, replicate, and restore digital assets from remote cloud environments following catastrophic data loss. Whether triggered by a ransomware attack, regional data center outage, accidental file deletion, or physical hardware destruction, a well-engineered cloud backup strategy ensures that critical business continuity remains uncompromised. Understanding Cloud Storage Disaster Recovery: Core Metrics & Architecture A common pitfall in enterprise IT is conflating standard cloud storage backup with comprehensive cloud disaster recovery (DR). Cloud Backup: The process of making periodic copies of data and storing them in cloud object storage (such as AWS S3, Google Cloud Storage, or Azure Blob). Backup focuses primarily on long-term retention and file-level restoration. Cloud Disaster Recovery: An end-to-end framework encompassing redundant cloud infrastructure, automated failover pipelines, data replication pipelines, and orchestration scripts designed to restore operational workloads within specified timeframes. The Governing Metrics: Defining RTO and RPO Every cloud disaster recovery plan is built around two core parameters: Recovery Time Objective (RTO): The maximum acceptable duration of infrastructure downtime before business operations face severe operational or financial damage. Recovery Point Objective (RPO): The maximum tolerable age of unrecovered data measured in time (e.g., 5 minutes of data loss vs. 24 hours of data loss). DR Metric Operational Definition Architectural Impact Target Goal RTO (Recovery Time) Downtime window between failure and system restoration. Dictates compute readiness (e.g., cold backups vs. active standby compute). Lower hours/minutes. RPO (Data Loss) Maximum data loss window acceptable during an outage. Dictates data sync frequency (e.g., daily batch vs. continuous asynchronous replication). Lower minutes/seconds. How Cloud Storage Disaster Recovery Works: Architectural Tiers Understanding how cloud storage disaster recovery works requires evaluating the four primary cloud DR architectural models. Choosing the right tier involves balancing technical complexity, recovery speed, and ongoing cloud infrastructure costs. 1. Backup and Restore (Cold Standby) Mechanism: System images and data snapshots are periodically pushed to cloud object storage. Compute environments (VMs, containers) are provisioned only after a disaster occurs. RTO & RPO: RTO: 12-24 Hours | RPO: 24 Hours. Best For: Non-critical internal applications, historical archives, and small businesses seeking low-cost storage recovery after data loss. 2. Pilot Light Strategy Mechanism: Critical data stores (relational databases, object storage buckets) are continuously replicated to a secondary cloud region and kept live. Compute application servers remain dormant as pre-configured Machine Images (AMIs) or Infrastructure-as-Code (IaC) templates until failover is triggered. RTO & RPO: RTO: 1-4 Hours | RPO: Seconds to Minutes. Best For: Core enterprise applications requiring rapid data preservation without the expense of running full compute in a secondary region. 3. Warm Standby Mechanism: A fully functional, scaled-down replica of the production environment runs continuously in a secondary cloud region. Upon detecting an outage, auto-scaling groups expand the standby environment to handle full traffic volume. RTO & RPO: RTO: Under 30 Minutes | RPO: Seconds. Best For: High-traffic e-commerce, financial platforms, and business-critical SaaS products. 4. Multi-Site Active/Active Mechanism: Live workloads run simultaneously across multiple geographic cloud regions or cloud providers. Dynamic DNS and global load balancers distribute traffic across active regions in real time. RTO & RPO: RTO: Near-Zero | RPO: Near-Zero. Best For: Mission-critical global applications where any downtime results in catastrophic financial loss. Primary Threats to Cloud Data: Why You Need a DR Plan Designing an effective cloud disaster recovery plan requires identifying the root causes of data corruption and infrastructure failure: Ransomware & Malware Attacks: Cybercriminals target backup indices and cloud storage buckets to encrypt live data and eliminate restore points. Accidental Deletion & Internal Human Error: Misconfigured deletion policies, bad script executions, or rogue admin privileges frequently result in sweeping data loss. Cloud Provider Regional Outages: While hyperscalers guarantee high availability, major weather events, power grid disruptions, or physical fiber cuts can disable an entire cloud availability region. Software Corruption & Bad Schema Deployments: Faulty code deployments can corrupt database tables across all synchronized instances if point-in-time recovery is absent. How to Create a Cloud Disaster Recovery Plan: Step-by-Step Developing a robust cloud disaster recovery for small businesses and enterprises requires a structured, multi-phase execution strategy. Conduct a Comprehensive Business Impact Analysis (BIA) Categorize every application and data asset into criticality tiers. Determine the precise hourly cost of downtime and data loss to justify your cloud infrastructure spend. Establish Cross-Region Asynchronous Data Replication Configure your cloud storage buckets (S3, GCS, Azure Blob) to automatically replicate objects to a geographically distinct secondary cloud region. This shields your business from localized cloud provider outages. Implement Immutable Storage (WORM / Object Lock) To guarantee cloud recovery after a ransomware attack, enable Write-Once-Read-Many (WORM) storage or Object Lock policies. This prevents anyone-including compromised admin accounts-from modifying or deleting backup objects for a set retention period. Step 4: Automate Infrastructure Deployment with IaC Store all cloud environment configurations as code using Terraform, AWS CloudFormation, or Ansible. In a disaster, IaC allows you to spin up identical VPCs, subnets, firewalls, and compute nodes automatically in minutes. Cloud Disaster Recovery Best Practices: Protecting Cloud Data Applying cloud disaster recovery best practices ensures your data remains recoverable regardless of the failure vector: Enforce the Modern 3-2-1 Cloud Backup Rule: Maintain 3 total copies of your data across 2 different media types (e.g., hot object storage and cold archive), with at least 1 copy stored offsite in an isolated cloud region or separate cloud provider. Implement Least-Privilege Identity Controls (IAM): Separate your production cloud account credentials from your backup storage repository credentials. Require Multi-Factor Authentication (MFA) and delete permissions approvals for critical storage buckets. Schedule Automated “Game Days” (Chaos Engineering): Never assume a recovery plan works until it is tested under simulated failure conditions. Run periodic test restores to measure actual Recovery Time Achieved (RTA) against your RTO. How to Recover Data from Cloud Storage After an Incident When an emergency occurs, follow this non-destructive operational workflow: Isolate the Affected Environment: Immediately disconnect compromised network segments or disable broken automated pipeline scripts to stop the spread of corrupted data or malware. Identify the